Phlebotomy and Venipuncture: Some History
Phlebotomy is the process of puncturing a vein (venipuncture) for the purpose of drawing blood, mainly for clinical lab testing and diagnostic testing and analysis, under the order of a physician. This has not always been the meaning of the term, however. Historically, phlebotomy meant “bloodletting”, or the removal of blood for health purposes. While there are some cases in which bloodletting is required for health purposes, such as for conditions such as Hereditary Hemochromatosis, this is not as common a practice anymore. Currently, phlebotomists and other healthcare providers are the ones who draw blood for testing, however, this wasn’t always the case. Historically, barbers, or “barber surgeons”, played this role.
Bloodletting actually started around 1,000 B.C. with the ancient Egyptians. They believed that if they let the blood out of the body, it would remove toxins, cure diseases, and remove evil spirits. This became very popular amongst the Greeks and Romans, then spread throughout Europe during the Medieval period. They believed that if you allowed the blood to remain stagnant in the body, it would result in disease. They believe that by releasing the stagnant blood, it would cure individuals of disease by forcing movement and circulation.
During medieval times, and through the 1800’s, barbers played a much broader role than simply cutting hair or performing a shave. They were also surgeons. They were referred to as “barber surgeons”. They also were rudimentary dentists, and performed tooth extractions. They were also phlebotomists and performed “bloodletting” procedures because they believed that removal of blood removed harmful toxins from the body and restored health. The barber surgeons would make an incision in the patient’s veins or arteries, then place a leech over it to suck up the blood. They believed that this method, along with cupping, was able to cure everything from acne to asthma, cancer, cholera, epilepsy, diabetes, coma, convulsions, high blood pressure and other maladies.
The original barbershop pole was red and white, and it stood outside the place where people would come to have these procedures done. The red represented blood, and the white represented bandages for wrapping limbs or setting bones. The white also represented teeth, since dental procedures were performed here. The USA added the blue stripe to represent a simple shave. Later, the red came to represent arterial blood, the blue came to represent venous blood, and the white came to represent the bandage.In modern days, the barber pole represents little more than signifying a barber shop that cuts hair and performs shaves.
The original barber pole sat above a brass wash basin where leeches were kept for bloodletting, and the basin was for blood collection. The pole itself was a staff used by the patient to grip during these procedures both to promote blood flow and to squeeze for pain, since this was prior to the days of anesthesia.
In 1210, in France, barbers were actually established as academic surgeons (long robe) and barber surgeons (short robe). Barber surgeons came to perform even more procedures, including cupping, which produced blisters to encourage blood flow and circulation, enemas and amputations.
References:
Maceira, C. CCI Training Center: A Brief History of Phlebotomy, 16 April 2020. https://www.ccitraining.edu/blog/a-brief-history-of-phlebotomy/

Venous Blood Collection (Phlebotomy) Preparation: Pre-Analytical Phase: Supplies, Equipment:
It is important to have all the supplies and equipment you need prior to starting a venipuncture procedure. These include:
- List of draws if on a hospital floor
- Test requisition/order
- Tourniquets
- PPE, extra gloves, masks, gowns, goggles, face shield
- Sterile disposable needles, syringes, butterfly needles, needle holders
- Mix of evacuated tubes
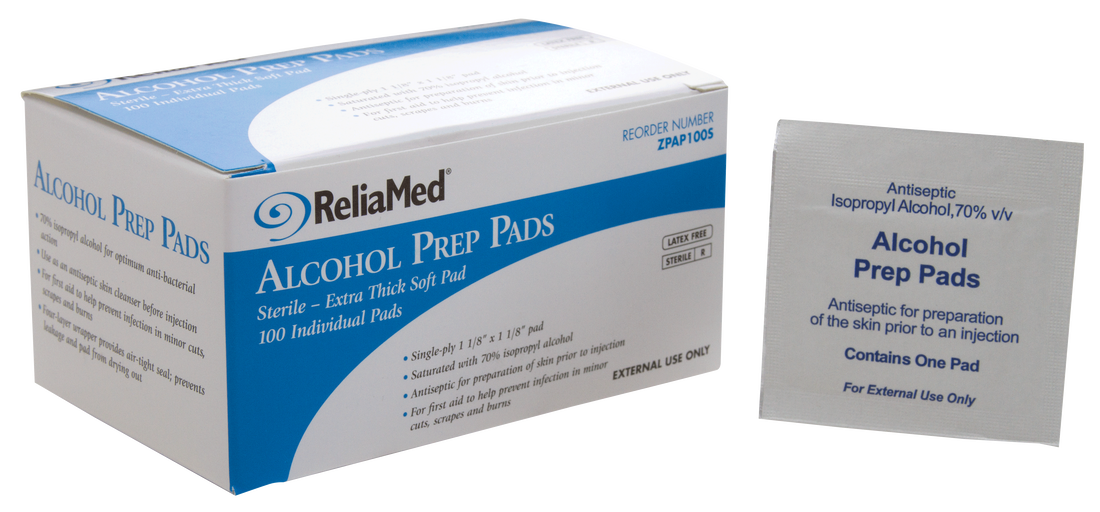
- Alcohol wipes (70% isopropyl), gauze, bandages, Coban
- Heel warmers
- Label Maker/Paper/Ink
- Pen, Permanent Marker
- Portable Sharps Container
- Cart or Hand Container
- Parafilm
- Biohazard Bags
The Pre-Analytical Phase, Analytical Phase, Post-Analytical: Preparation (A Way to Remember the Steps, by Jeanette Reynolds)
P = PREPARATION & PPE (Personal Protective Equipment)
H = Honor HIPAA (Health Information Portability Information and Accountability Act)
L = Labels (At least 2 patient identifiers, verify information)
E = Each person/individual matters and should be treated with respect
B = Blood draw materials ready
O = Open communication (reveal who you are and what you are going to do step-by-step)
T = Tourniquet (put it on correctly, and for no longer than 1 minute)
O =Order of the draw is followed
M = Make sure you use the safety feature on the needle and put it in the sharps container
Y = Your area is disinfected, you’ve properly removed your PPE, you’ve monitored the patient for adverse effects, and your hands are washed
P = PREPARATION, PPE and PATIENT CARE
The first step of your day in any aspect of healthcare is preparation. You want to make sure you disinfect your area, make sure you're stocked up with all the supplies and things you'll need, check expiration dates, make sure that you or your team has performed QA/QC, and that you have dressed in proper PPE (personal protective equipment). This ranges from gloves to lab coats or gowns, to masks, to face shields to goggles to shoe covers, depending upon exactly where it is you work. Make sure you have backup materials and supplies with you for when you need to change them. When you are prepared, you will feel more confident and ready to perform your job to the best of your ability, putting patient care first, and providing excellent patient care.
H = HONOR HIPAA, the Health Information Portability and Accountability Act. This is a respect for your patient, their personal identifying information, and confidentiality. You can do this by making sure you don't leave out personal documents that anyone could view or see that should not access it, asking for patient's permission before giving out any information, getting their written signature prior to release of information or performing a procedure, keeping the computer off or turned away from those who could view private information, and not talking about the patient or their information publicly, such as in hallways or elevators.
L = LABELS. Most places require that you use at least 2 identifiers to confirm identity of your patient, and that you have them repeat it back to you to confirm it. Most common are the name and date of birth, but may also include the SSN (social security number or "last 4"), a special MRN number and/or M number, or another unique patient identifier number assigned by your facility.
E =EQUALITY. Each and every person matters and should be treated with patience, kindness and respect. Patients often come in worried, nervous, anxious, in pain, tired, not feeling well, and confused about what is going on and why they need tests or blood drawn. You have the opportunity to be there for the patient and their family members, provide support and reassurance, and to make them feel comfortable and explain what you are doing step-by-step and why.
B = BLOOD DRAW MATERIALS READY. Make sure before you perform venipuncture, that you have all the materials you need ready to go. Remember the order of the draw and have your tubes and labels and tourniquet, alcohol pads, gauze, and bandages ready to go. Make sure your cart is stocked (always check it and do not rely on the shift prior to yours) and that you are ready to go before you start and before you call your patient back or go into their hospital room to perform venipuncture.
O = OPEN COMMUNICATION. When you approach your patient, introduce yourself and your role, what you are there for, what blood you will be collecting, what you are going to do (step-by-step) and the tests that this blood draw is for. Ask them if they have any questions ahead of time and collect any history you need for documentation. If the test requires fasting, ask them the last time they ate or drank anything. Above all, keep the lines of communication open and try your best to make your patient feel comfortable and relaxed.
T = TOURNIQUET. You are ready to put the tourniquet on. Make sure you do so properly and then palpate for the vein. Remove the tourniquet, and use alcohol pads to wipe off the patient's arm in concentric circles, from inner to outer circles, for at least 30 seconds. Do not blow on the area to dry it. Instead, allow it to air dry while you confirm the patient's identity with the label. Put the tourniquet back on when ready to draw the blood, but do not leave it on for more than 1 minute, otherwise, some of the metabolites will concentrate in the area, easily leading to false results. At this point, you can ask your patient to make a fist while you grab your materials for the venipuncture.
O = ORDER OF THE DRAW. It is critically important to follow the order of the draw in order to avoid carryover of additives or anticoagulant or blood into other tubes, which may cause false results, some which may result in unnecessary treatment, missed treatment, or life-threatening incompatibilities with life if certain things are elevated or depressed. Invert the tubes to mix the additive with the blood, and place the labels on the tubes right away. Have your patient hold a piece of gauze or cotton on the site of venipuncture, and cover it with a bandage.
M = MAKE SURE...you use the safety feature on the needle, throw away the syringe into the sharps container, clean up and disinfect the area, monitor the patient for any side effects or adverse reactions, and that you have all the paperwork ready to go.
Y = YOU. You are now ready to remove your gloves, wash your hands, and put away or restock any equipment you've just used.
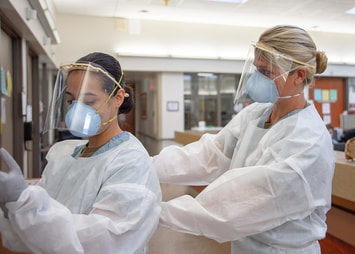
PPE: Personal Protective Equipment
|
HIPAA: It's the law. It stands for the Health Insurance Portability and Accountability Act.
|

These vacutainers have barcode labels that track them and associate them with the patient
|
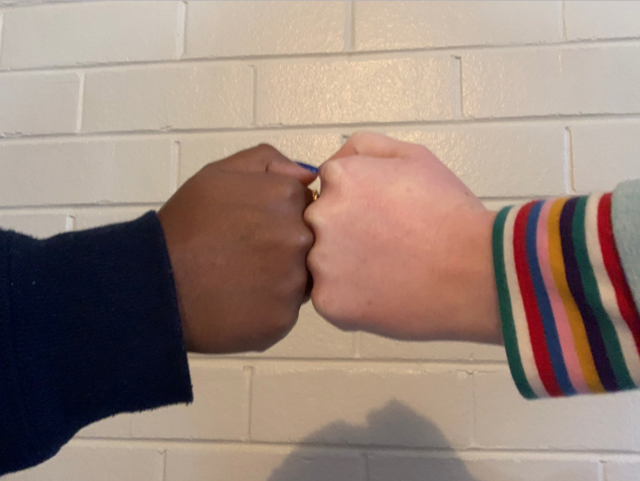
Fist bump for equality, no matter what gender, race, religion, sexual orientation, or any other factor. Treat everyone equally and with respect. Everyone matters.
|

Blood draw supplies and PPE are stocked, the room is cleaned and disinfected, and they are ready to start the day, whether it is the draw room or phlebotomy cart.
|

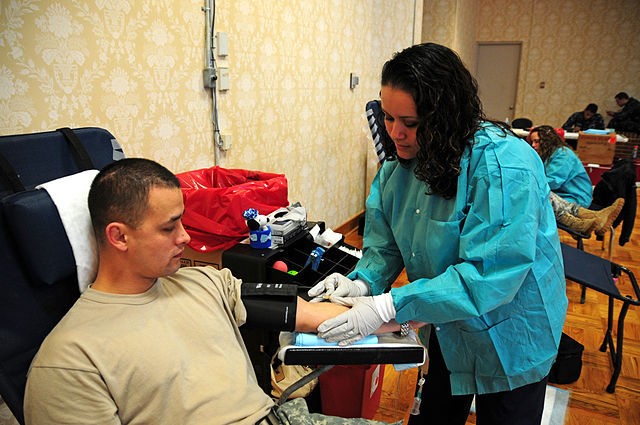
Open communication, explaining who you are, your role, and what you will be doing, and answering the patient's questions are key to patient satisfaction and comfort.
|
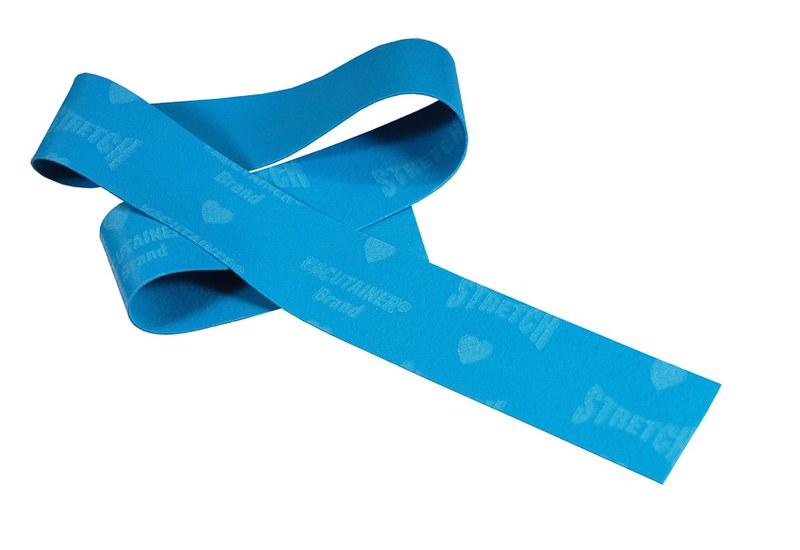
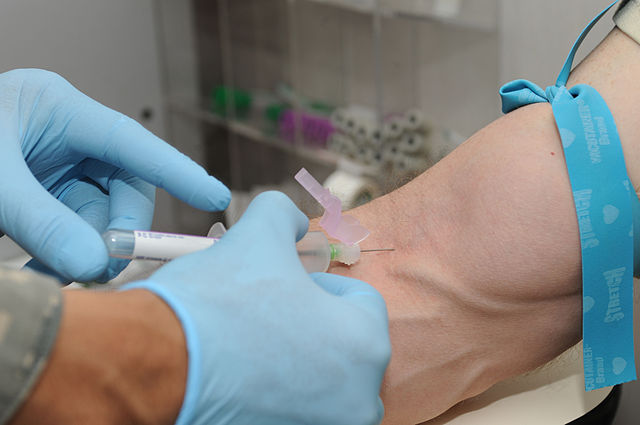
Making sure you know exactly how to apply the tourniquet and for how long is important because it affects the actual test results.
|

It is important to follow the order of the draw in order to prevent carryover of additive or anticoagulant from one tube to the next during the phlebotomy procedure.
|
Never recap the needle. Instead, use the safety feature and immediately close it after the blood draw, throwing the entire syringe in the sharps container. This protects both you and your patient from accidental needle sticks.
|
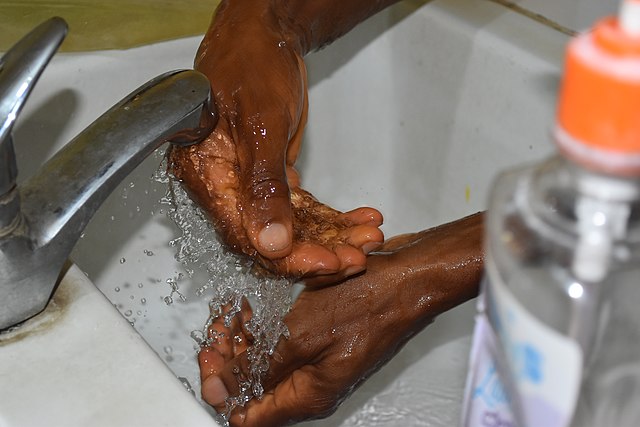
Don't forget to wash your hands between patient contact.
|
Initiation of the Procedure, Selection & Preparation of Appropriate Site of Collection, Special Considerations:
There are important things to remember when initiating a phlebotomy procedure:
- Introduce yourself, your role, and properly identify your patient
- Gather all your supplies and equipment and have them ready before you start
- Make sure you have on and put on your PPE
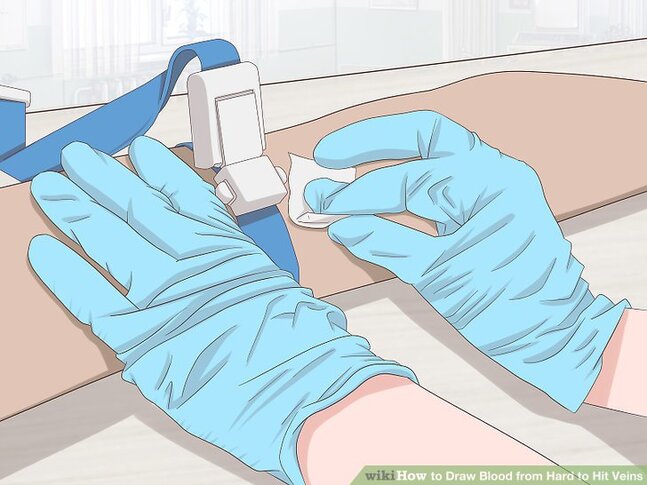
- Keep the plastic cover on the needle until you are ready to begin venipuncture.
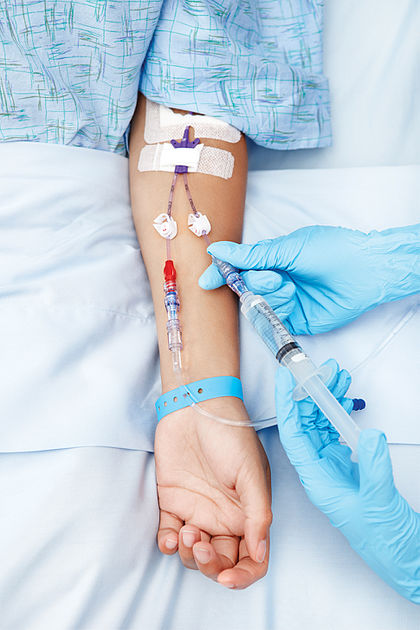
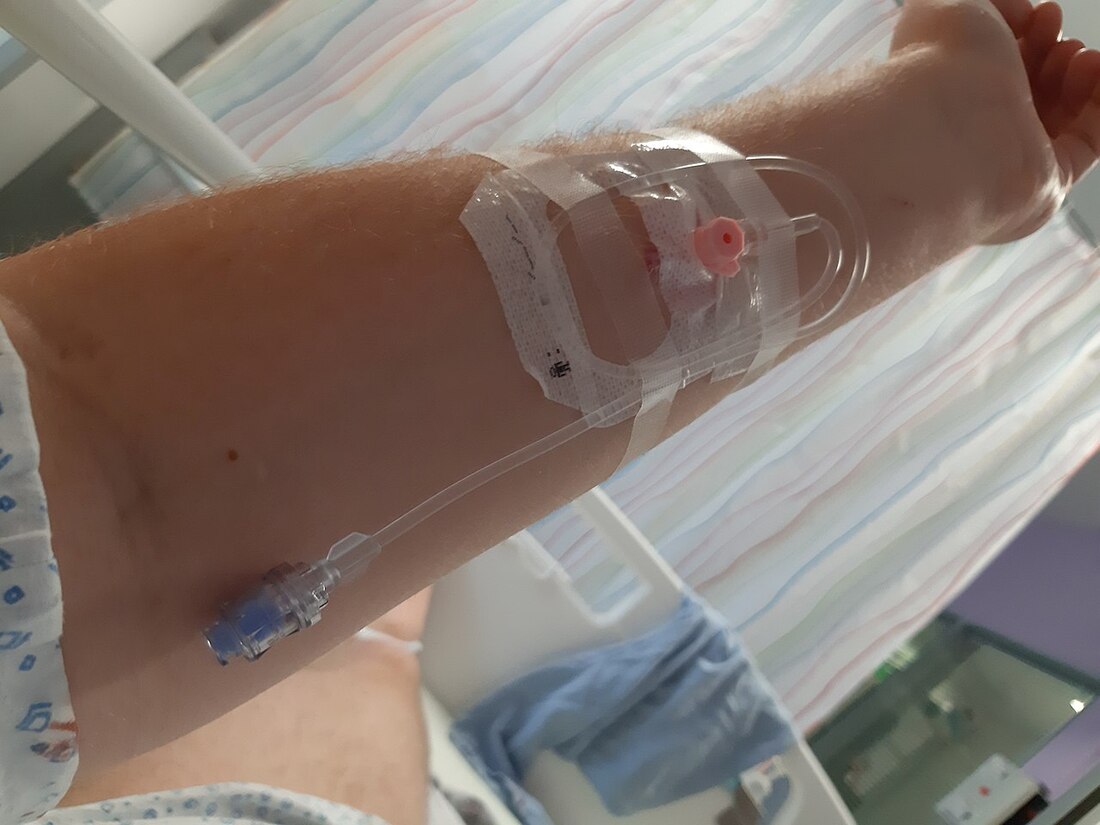
- Avoid getting blood from the IV line, since this will cause fluid to mix with blood, resulting in incorrect test results, so if you notice this, request the RN to turn the IV off for 10 minutes prior to collection, and try to get it from the opposite arm or an alternate site.
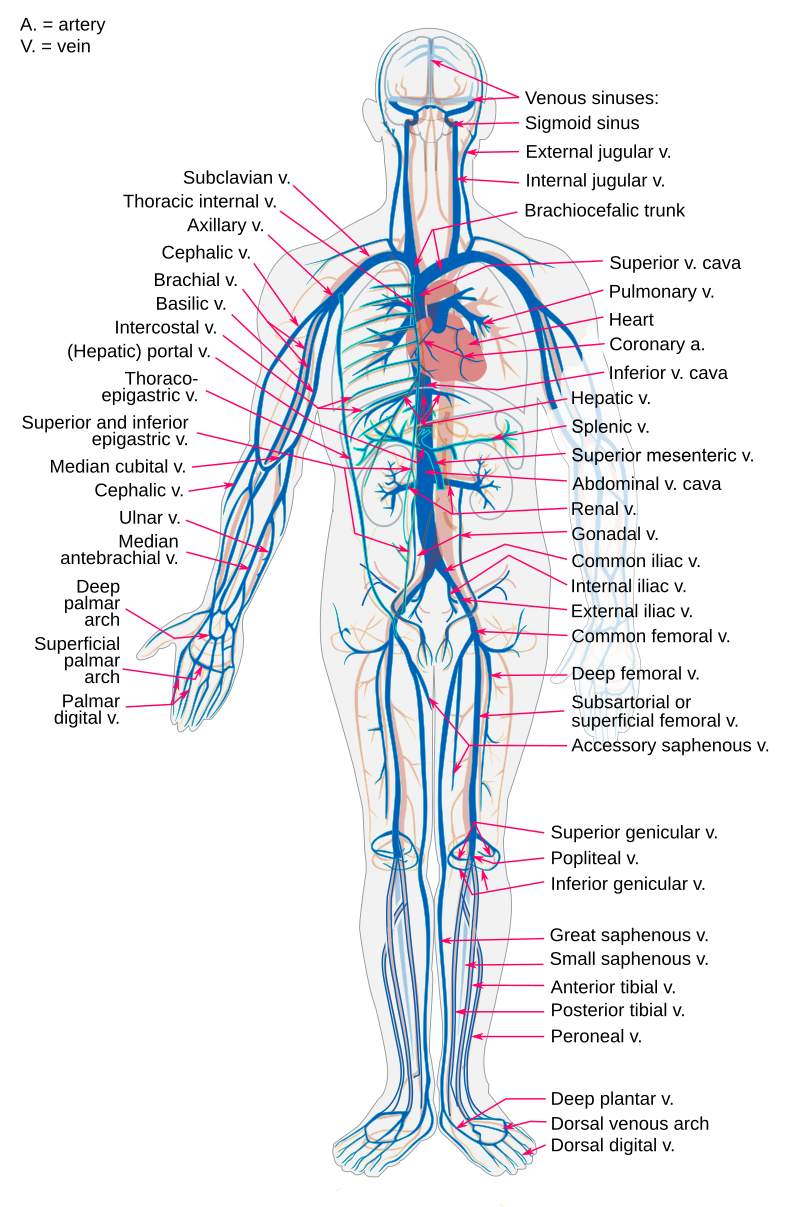
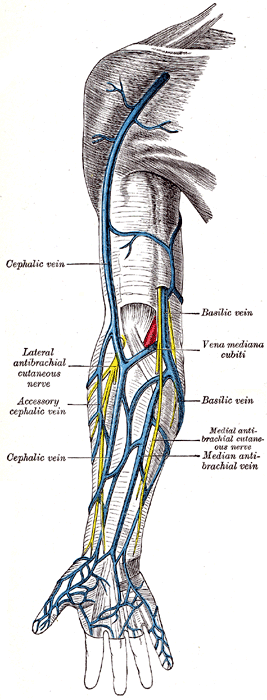
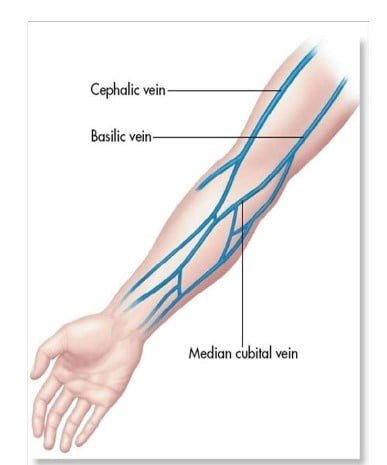
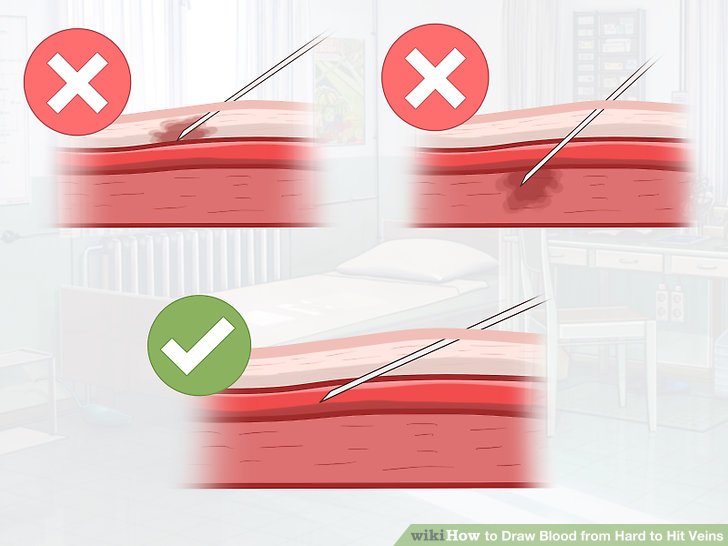
- Visually inspect both arms and choose a site that seems like it has not been repeatedly stuck. Observe the 3 most commonly used veins for venipuncture: cephalic, basilic, and median cubital.
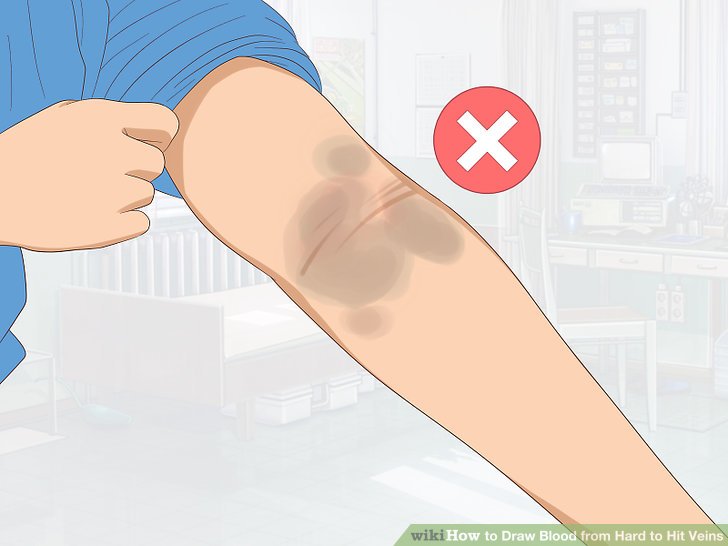
- Veins may be very difficult to see or even palpate in patients who have tattoos, who are very obese, who have scar tissue, burns, edema, have been stuck a lot, or who are on dialysis. Consider alternate sites of collection, or blood capillary collection in these patients.
- Blood must never be drawn from a vein in an arm with a cannula, which is a temporary dialysis access device, or a fistula, which is a permanent surgical resection or fusion between a vein and an artery. In this case, it is best to perform venipuncture on the back of the hand or on the underside of the arm instead.
- If a patient has had a mastectomy, and lymph nodes have been removed from that side, you need to avoid that side when performing venipuncture and perform it on the opposite side.
Remember: Prepare Your Materials, Cart, Supplies; Wear PPE; Introduce Yourself to Your Patient; Provide Clear Instructions and Information Step-By-Step About What You are Doing and Why
Select a Good Vein:
|

|
|
|

Remember: Avoid blood draws from an arm with an IV line (left) or a cannula (right)
|
|
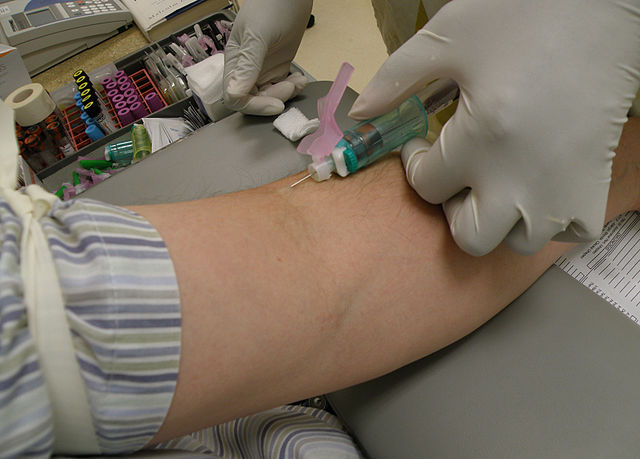
The Tourniquet:
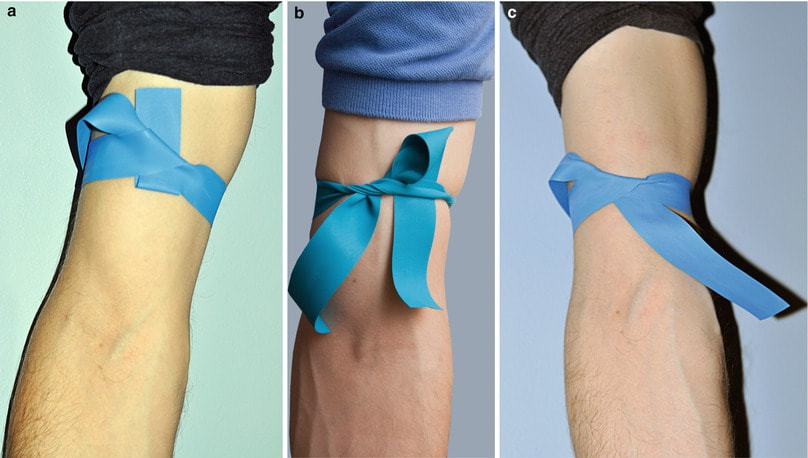

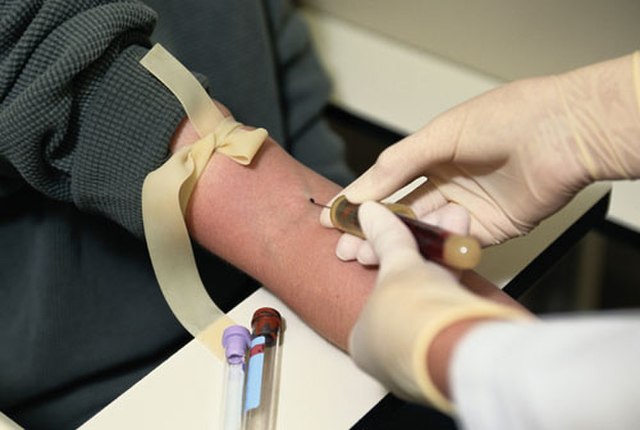
Notice the specific way in which the tourniquets are wrapped around the patients' arms in the images below. Apply the tourniquet to your patient's arm.
When the tourniquet has been applied for the blood draw, make sure you leave it on no longer than 1 minute. IMPORTANT: If the tourniquet stays on longer, some of the metabolites can concentrate in the bloodstream, leading to false elevations of certain blood tests, including albumin (ALB), aspartate aminotransferase (AST), calcium (Ca++), cholesterol, iron (Fe+), lipids (HDL/LDL), total bilirubin, and total protein.
Helpful Tips:
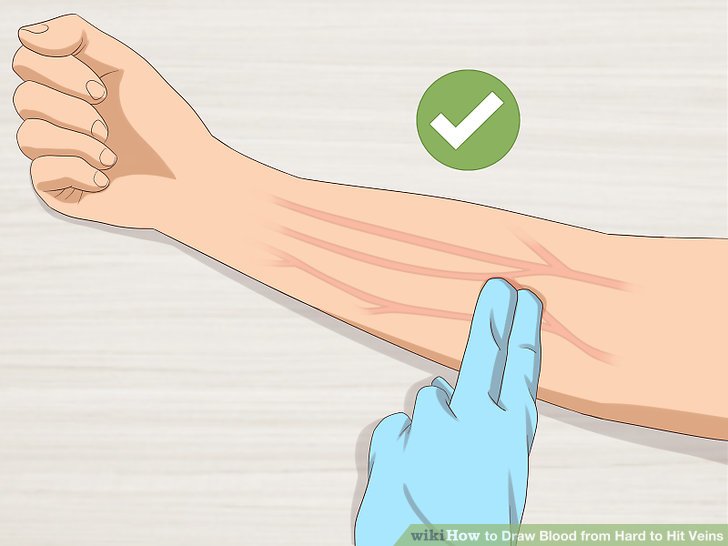
- To make the veins pop out more, ask the patient to make a fist.
- Use your index finger to palpate or feel for the best vein, preferably one that feels secured in place with the least tendency to roll and the one that feels the most resilient (spongy/elastic).
- The ideal site is usually either near or just below the bend in the arm.
- The best veins to choose from are the cephalic, basilic or median cubital veins.
- Avoid the larger veins since they have a tendency to roll, and the smaller and superficial veins, since they may blow out, resulting in a bruise or hematoma.
- If you don't find the ideal vein, try the other arm. Remove the tourniquet, and apply it to the other arm and perform a palpation as you did before.
- If you still have difficulty, check the wrist, back of the hands and feet, and even the ankles. It is OK to ask for help or assistance from a more experienced phlebotomist.
Performing the Venipuncture:
|
Concentric circles means from the inside (middle) outward
|
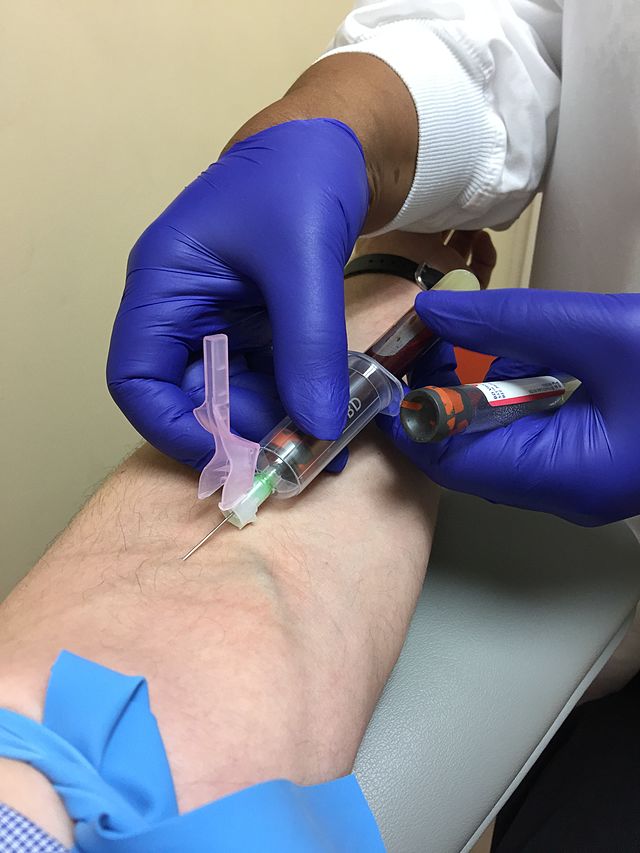
- Once you have selected the best site for the venipuncture, remove the tourniquet and cleanse the skin in the area of the venipuncture site, using concentric circular motions from the center outward, for at least 30 seconds, with 70% isopropyl alcohol.
- Never go back over the area once you have cleansed the skin, and never blow on it, or you will contaminate the area. Allow it to completely air dry.
- The purpose of this is asepsis, or the reduction of microbial life to safer levels on living tissue and skin.
- Avoid touching the cleansed venipuncture site as well to maintain asepsis. This is using good aseptic technique.
- Use one hand to hold the evacuated tube assembly.
- Make sure you position the patient's arm slightly downward, and use your finger or fingers on the other hand to secure the skin and vein in the area of the forearm below the venipuncture site, to tighten the skin, secure the vein and help prevent rolling. View the images above to see several examples of how this is being done.
- Hold the needle assembly with the attached holder approximately 1-2" below and at a straight angle/line with the site you intend to perform the venipuncture.
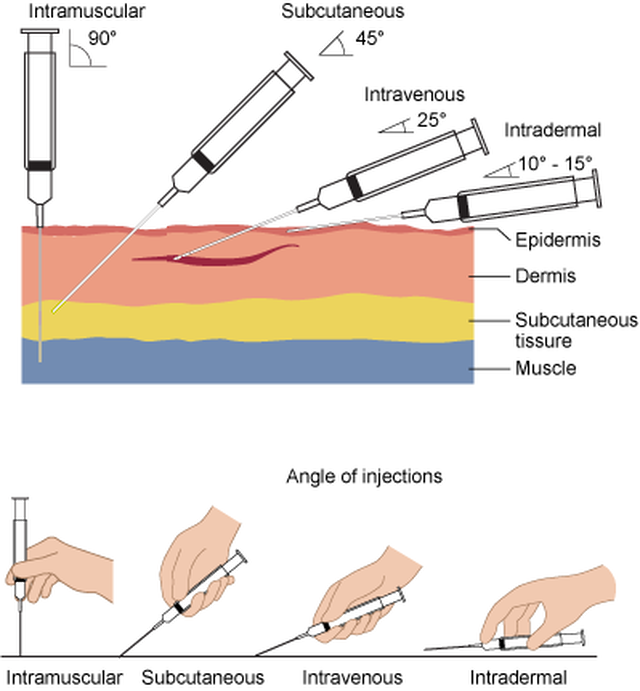
- The angle of the evacuation tube should be at about 15-20 degrees and the needle should always be BEVEL UP (remember: "belly up" = "bevel up") as seen in the image above.
- Let the patient know what to expect and what you are doing, and then insert the needle through the skin and into the vein.
- You will feel and hear a slight "pop" and you'll know you are in the vein.
- Be careful not to go too far, and make sure the insertion motion is quick and smooth.
- One hand should hold the needle steady without moving or jarring it, while the other hand pushes carefully the tube to the end of the plastic holder.
- You can collect multiple samples this way as soon as each tube has filled.
- Always follow the order of the draw, as discussed below in detail.
- Once the blood enters the evacuated tube (flash back), you can remove the tourniquet and continue.
- Ask the patient to open their hand.
- You are ready to remove the blood-collecting unit with one hand and immediately close the safety feature.
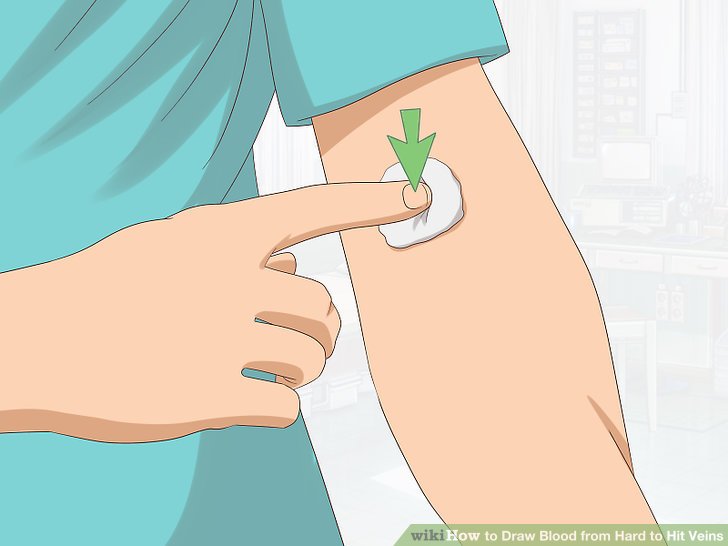
- Place gauze over the patient, secure with Coban or bandages, and press down.
- Ask the patient to hold the gauze and elevate their arm and apply pressure for a few minutes to stop the bleeding.
Completion of the Procedure: Post-analytical Phase
- At this point, mix the tubes by gentle inversion several times, without shaking them.
- Discard used equipment and clean up your area.
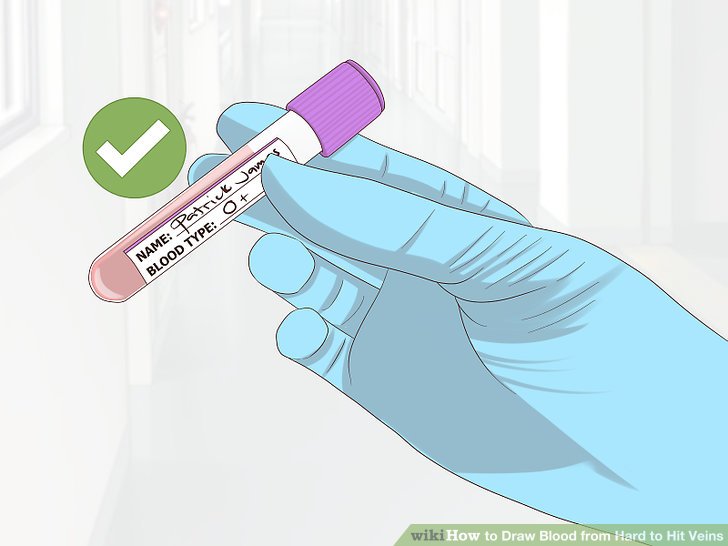
- Label all the tubes, remove your gloves and wash your hands.
- Wait a few minutes to monitor the patient and make sure they are not feeling dizzy or nauseous before discharging them or leaving the hospital room.
Problems and Complications to Be Aware Of:
- If you are struggling to get the patient's blood, do not attempt to perform the procedure more than twice.
- Notify your supervisor and ask for help or assistance
Problems or obstacles you may encounter include the following:
- The patient is resistance to have their blood drawn
- The bore of the needle is deformed, against the wall of the vein, or went through the vein
- The vein has rolled
- The patient moves suddenly or jerks and it causes the needle to come out too early
- The blood was collected in the wrong type of tube
- Not enough blood was drawn in a particular tube
- The patient feels dizzy, nauseous, or passes out (faints, syncope)
- The patient pulls out the needle
Phlebotomy Complications To Be Aware Of:
- Bleeding from the site of venipuncture
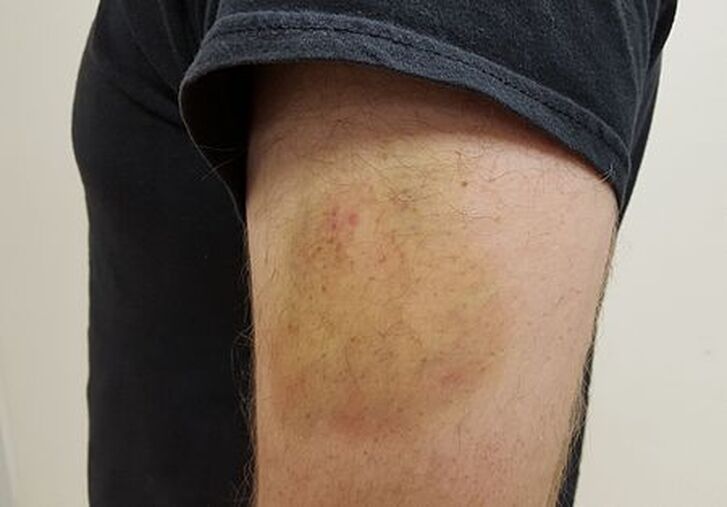
- Hematoma
- Phlebitis
- Infection
- Anemia
- Neurological (seizure, epilepsy, convulsions, pain)
- Cardiovascular (orthostatic hypotension, fainting, shock, cardiac arrest)
- Dematological (allergic reaction to latex or adhesive or iodine)

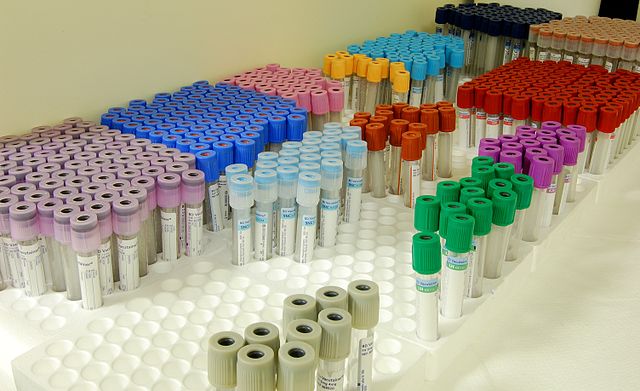
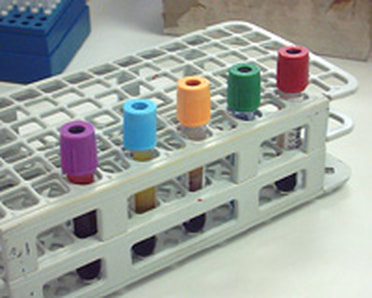
The Rainbow: Vacutainers, Additives and Anticoagulants
|
Most of us who work in healthcare refer to the vacutainers and vacuettes as the rainbow. You can see a variety of them here. Each colorful tube top represents the type of tube it is and the additive or anticoagulant it contains. Most of the time, the additives or anticoagulants are either powders, sprays or gels, if any. They are collected in a specific order (see below) in order to prevent carryover, which happens if the blood, additive or anticoagulant are carried over from the needle from one tube into the next during collection.
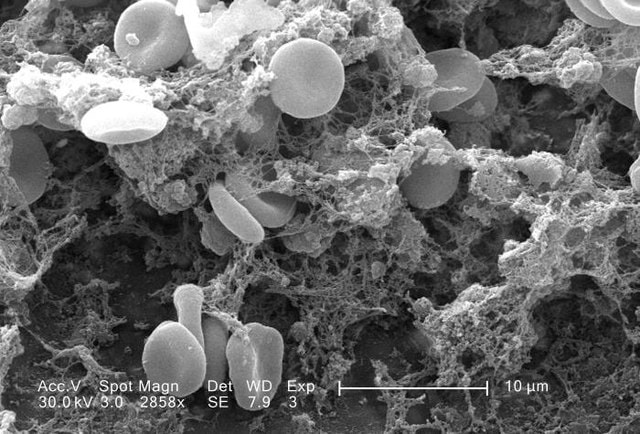
Carryover can cause falsely elevated or depressed test results, which can result in missed treatments, unnecessary treatments, life-threatening treatments, or mistaken life-threatening conditions. For this reason, phlebotomists, RN's and lab techs follow the "Order of the Draw", which will be further discussed below. When fresh, whole blood is mixed with a substance to prevent it from clotting, this is called anticoagulation, and the substances are anticoagulants. This enables the blood to separate into plasma (straw-colored fluid) at the top, a thin buffy coat (leukocytes and platelets) in the middle and packed erythrocytes (red blood cells) at the bottom. When anticoagulated blood is allowed to sit for some time, it will naturally separate into these 3 layers, or centrifugation will speed up the process. 1. Plasma: This is the top, straw-colored liquid, and it represents about 55% of the total blood volume. It is 90% water and 10% solutes, including iron, clotting factors, vitamins, minerals, electrolytes (Na+, K+, Ca+, Cl-, Mg+, etc...). 2. Buffy Coat: The thin, middle layer is the buffy coat. It is somewhat clear, and it contains the white blood cells (leukocytes) and platelets (thrombocytes), and represents about 1% of the total blood volume. 3. Erythrocytes (red blood cells): This is the bottom layer, consisting of packed red blood cells, representing about 45% of the total blood volume, or the hematocrit (Hct). Some of the most frequently used additives and anticoagulants are:
|


|
|

|
Order of the Draw:
A helpful mnemonic to remember the order of the draw is this:
Stop Light Red Stay Put Green Light Go
Stop Light Red Stay Put Green Light Go
1) Blood Cultures (SPS) (Sterile Broth)

Mnemonic: SPS = Stop
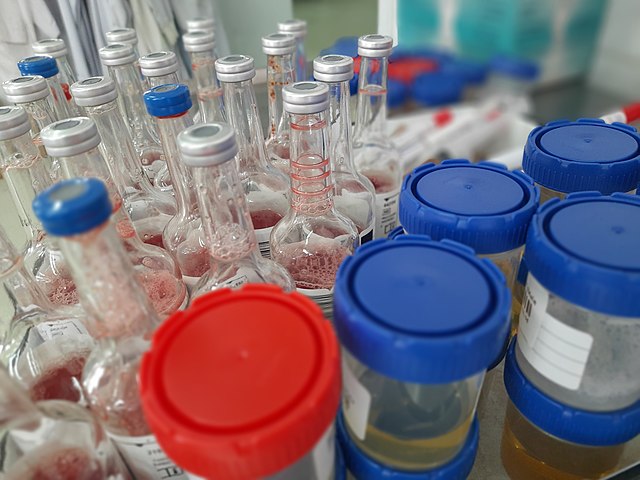
These are the Bactec type of blood culture bottles, and they are glass, so be very careful when collecting these.
|
Always make sure that the patient label contains all the proper information, including your initials and the date and time of collection, and please make sure it does not cover the barcode attached to the bottle, because the lab tech needs to scan both, in order to associate the bottle with the patient, and the bottle with the machine to track the time it goes in and comes out.
|

This is what the Bactec incubator looks like that these types of blood cultures are inserted into. It monitors them for 7 days and keeps them at the right temperature of around 37 degrees Celcius, as well as keeps them lightly rocking to prevent clotting and to enable thorough mixing of the blood with the broth inside. There is a CO2 indicator at the bottom of the tube, and sensors on the machine that detect increases in CO2 if microbes are growing in the bottle, creating acidosis, which is detected by the machine. The machine alarms to alert the lab tech, who then removes it and makes a Gram stain to look for microbes.
|
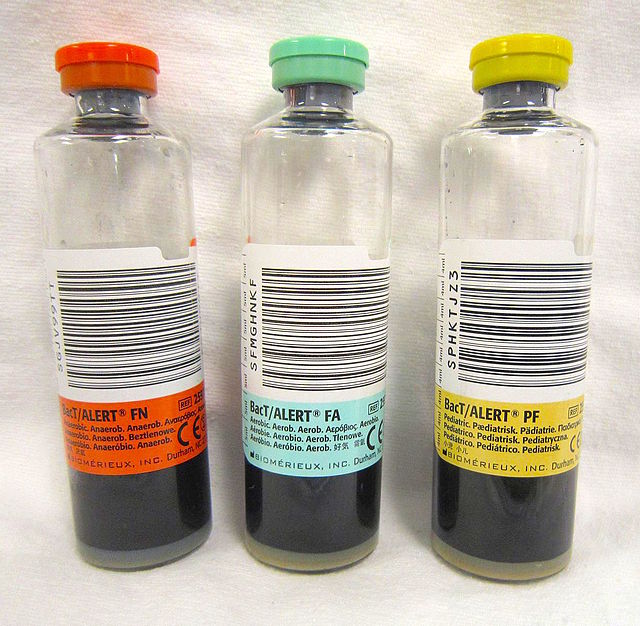
These are the BacT Alert style of blood culture bottle. They are made of plastic, but the concept is the same as that of the Bactec system. The only difference is that the BacT Alert bottles contain charcoal, and it can be more challenging for the lab tech to see the microbes growing in the culture on the Gram stain.
|
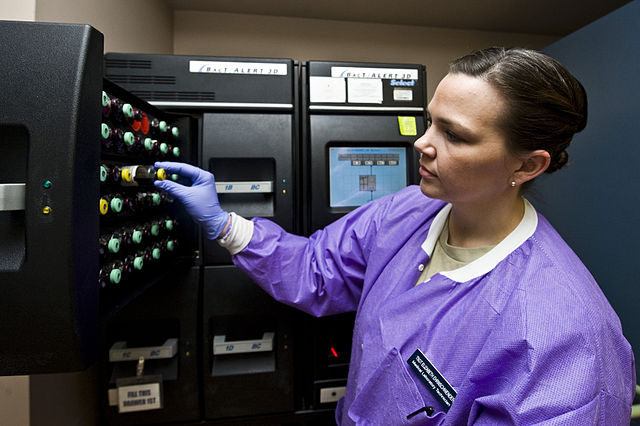
This is the BacT Alert style incubator.
|
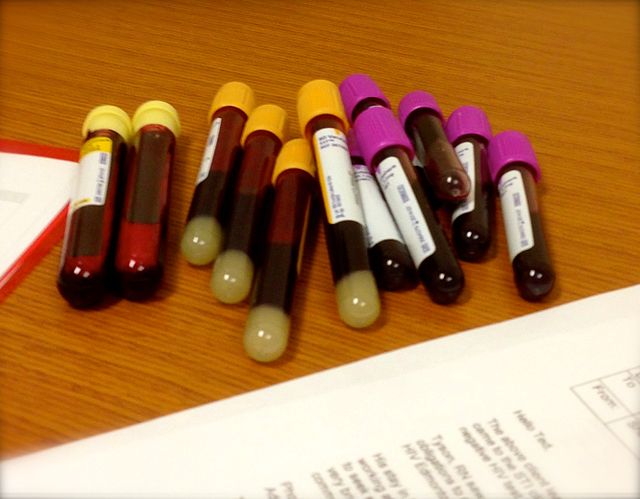
SPS blood tubes are on the far left (yellow top). These were collected and need to be manually entered into the blood culture bottles as seen above with a plastic transfer device.
|

Plastic transfer device
|
Blood cultures should always be the first type of blood collected, even before antibiotics are started on the patient, in order to maximize possible recovery of any microbes that may be growing inside it. When gathering your supplies, make sure you have several blood culture bottles ready, Lauer adaptors, your tourniquet, syringes, needles, gauze, alcohol pads, chlorhexidine wipes, bandages and a label maker with label paper, ink, pen, PPE, and a sharps container on your cart.
Blood cultures come in a set, and you should try to fill them both if possible. The blue top is for aerobic (oxygen-requiring) cultures, and the purple top is for anaerobic (are poisoned by oxygen) cultures to cover both classes of microbes. If the patient is a very difficult stick, or you simply cannot get enough blood, you can use a pediatric bottle (silver or pink top), no matter their age.
Blood culture bottles are filled with SPS, or sterile broth, and contain a CO2 indicator at the bottom. There is a fill line, which you should strive for when collecting blood for proper blood-to-broth ratio (5 mL of blood). When collecting blood cultures, to make it easier, you can insert a Lauer adapter onto the top if you need to.
There are barcode labels that you will find attached to the side of the tube. These are separate from the patient information labels you'll attach to the bottles, so please, make sure that you put the labels next to, the same direction as, and NOT over the bottle barcode. Also, when collecting, please write the date and time of collection, as well as your initials, on the patient label, so that the lab tech can contact you if there is a question about the collection process or if they need to call you to report a positive blood culture, which means there is a microbe or microbes growing in the blood culture tubes.
Once the blood gets to the lab, the lab tech has a barcode scanner that they will use to scan both the bottle and the patient label to associate with patient with the bottle and the bottle with the incubator for tracking. The incubator keeps the blood at a specific temperature (37 degrees Celsius) and rocks it lightly to keep the blood and broth mixing, and each well contains a sensor that detects accumulation of CO2 in the bottom of the tube as a result of microbial growth in the tube. In this case, the machine will alarm, and the lab tech will remove it, scan it, make a Gram stain, and report their findings to the RN or MD on the floor, release the results, and culture the blood on Petri dishes and incubate them for further identification and antibiotic susceptibility testing.
Collecting Blood Cultures:
- Blood culture bottles
- These contain SPS and are considered sterile.
- They contain a sterile broth, which, when mixed with blood, follows a proper blood-to-broth ratio.
- Always remove the removable tabs first, then wipe off the tops of the stoppers with 70% isopropyl alcohol wipes, followed by chlorhexidine (betadine or iodine) wipes to make sure they are sterile and free from dust or contamination.
- Clean the skin 3x with povidone-iodine solution or a chlorhexidine solution with a scrub applicator.
- Always follow this up with application of 70% isopropyl alcohol in concentric circles for 30 seconds and allow to air dry completely. Never blow on it or you will recontaminate the area.
- If you need to palpate the vein again, use a gloved finger triple-cleaned with povidone-iodine solution first.
- Blood cultures and blood should always be drawn preferably from the side opposite that of a port or IV with a sterile needle and syringe. If this is not possible, it should be drawn below it, but only after the IV has been turned off for at least 10 minutes prior, then flushed by collecting 1-2 gold-top tubes of blood, discarding them, then moving on the further blood collection to remove any saline and/or medications present in the IV line.
- It is important to remember not to cover up the bottle barcode label with the patient barcode label. Both are needed, both are important, and both are used to scan and associate the patient information with the bottle, and the bottle with the incubator. It will stay in the incubator for up to 7 days, but throughout that time, several preliminary results will be released if there is no growth, and a lab tech will call the RN, MD or PA to let them know if there is growth in the bottle(s).
- Always collect the blood cultures before the patient has started antibiotics or IV therapy to prevent contamination and to enhance recovery of microbes.
2) Sodium Citrate (Light Blue)

Mnemonic: L (light blue) = Light
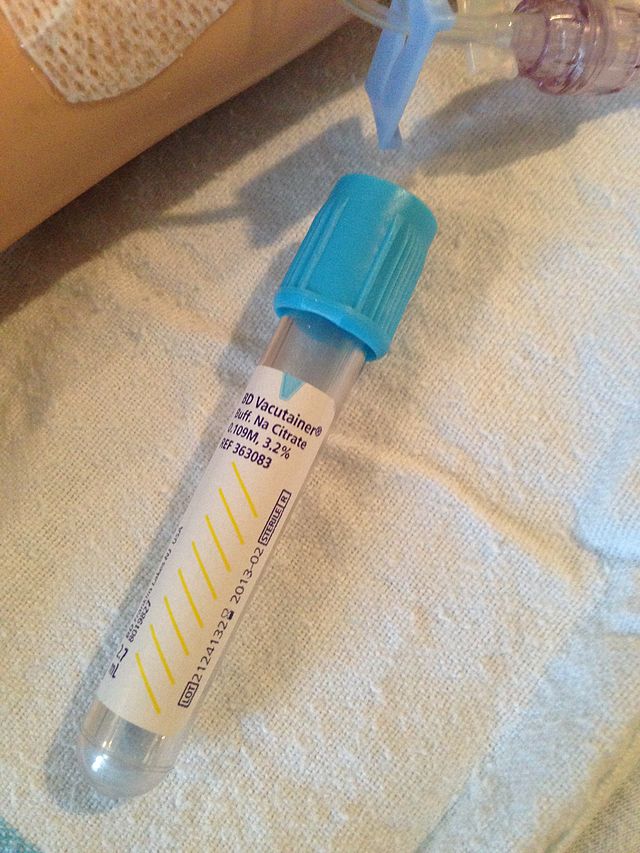
Light blue top contains 3.2% sodium citrate anticoagulant, and it is used for coagulation (blood clotting) studies
|
|
The sodium citrate tube is the light blue top tube. It contains 3.2% sodium citrate as the appropriate concentration of additive, set and approved by the International Society for Thrombosis and Hemostasis (ICSH) and The College of American Pathologists (CAP).
How does it work? The sodium citrate is used as an anticoagulant for activated prothrombin time (aPTT) and prothrombin time (PT) testing, as well as for the Westergren Erythrocyte Sedimentation Rate (ESR).
It is critical that the proper ratio of anticoagulant-to-blood is met in this tube (1:9, or one part anticoagulant to 9 parts blood), otherwise, too much anticoagulant/too little blood can produce errors. There is a line on the tube to make sure that you reach when drawing blood into this tube.
Typically, due to the sodium citrate present in the tube, this tube is really not used for other lab tests other than coagulation studies except for very rare cases in which it may be used for specific hematology review.
It is important to make sure that you find out and let the laboratory personnel know if the patient that you have drawn this tube from is on heparin (warfarin/coumadin) or other blood thinning medications such as Xarelto, because this needs to be documented in the LIS so that all healthcare providers are aware that this may affect test results.
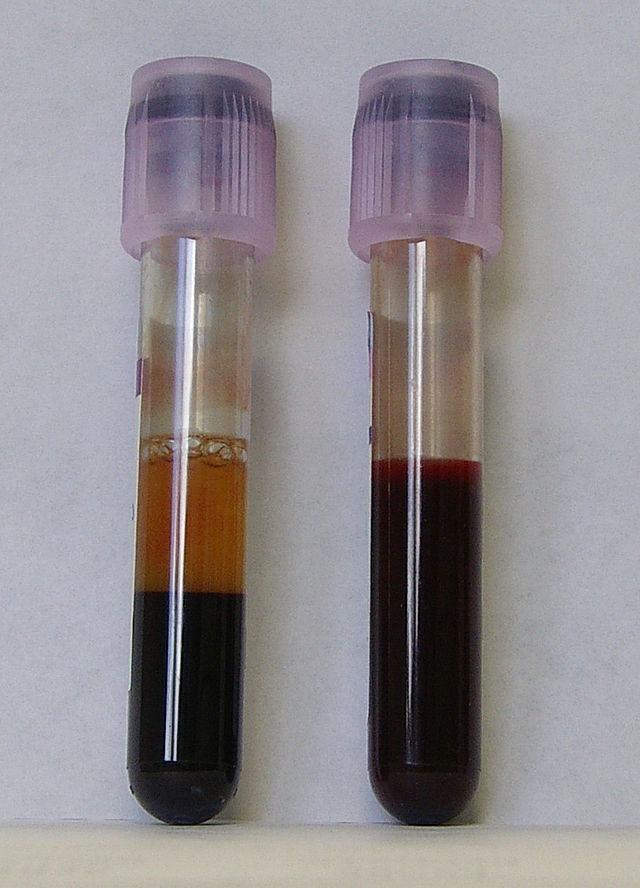
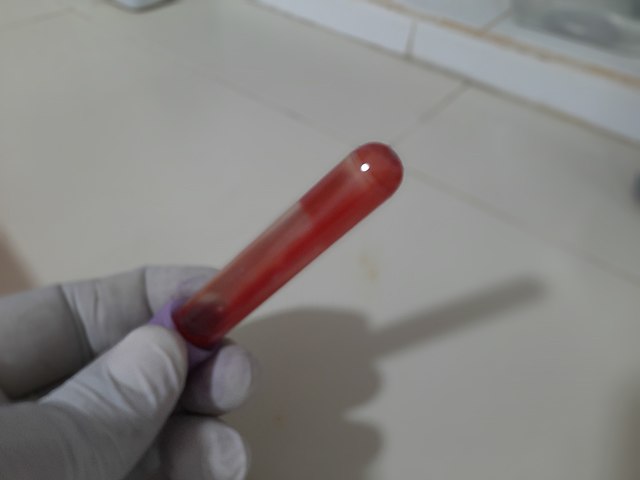
3) Red Top (Red)

Mnemonic: Red (R) = red
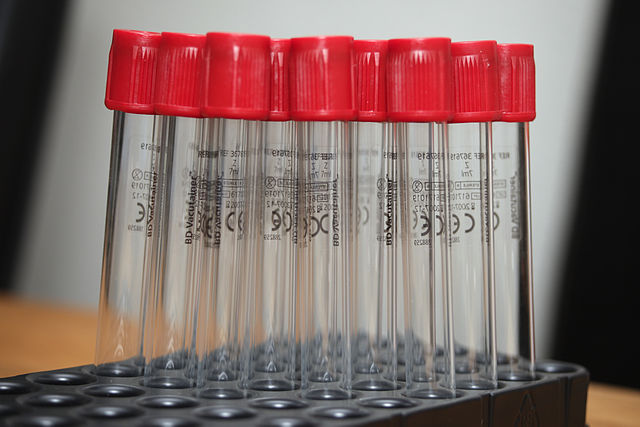
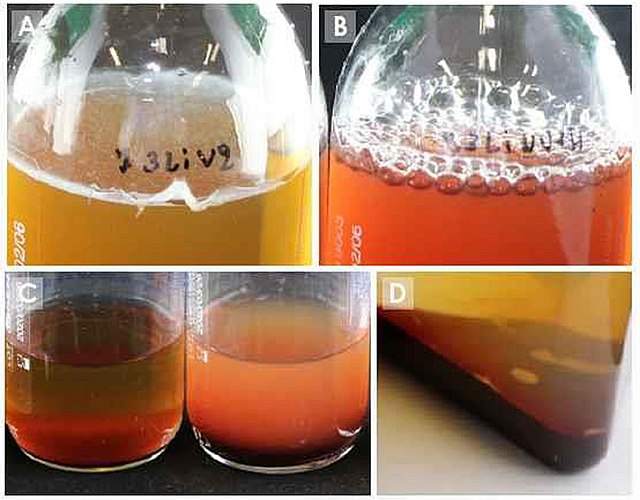
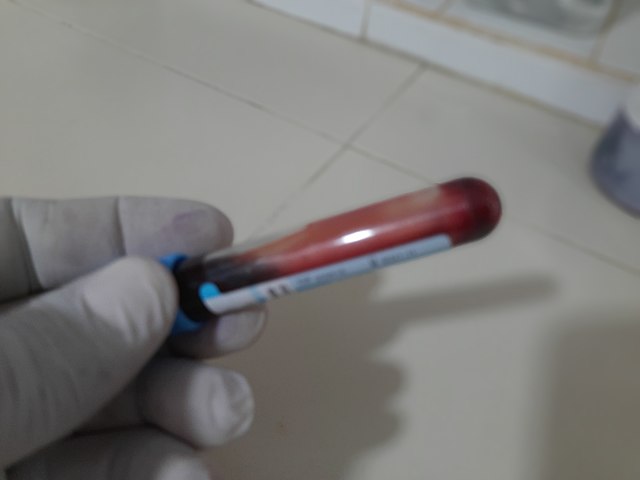
Red top tubes contain no additives or anticoagulants whatsoever. With these tubes, after blood is collected, it is left to sit for 60 minutes to clot.
|
The blood after 1 hour...
|
|
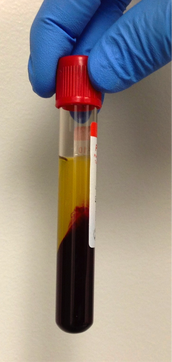
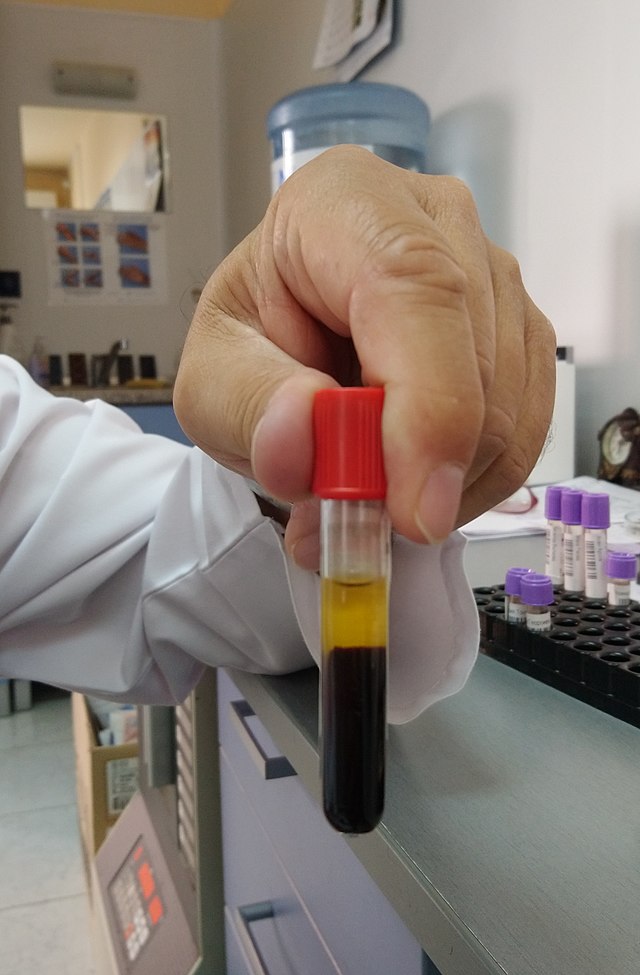
The red top tube contains no additives or anticoagulants. This tube is used to collect blood needed for whole blood testing. The blood collected needs to sit for 1 hour so it can clot naturally outside the body (in vitro), or in the tube.
Blood that has been freshly drawn into a glass tube will at first appear as a dark-red fluid. The clotting process begins in just minutes. It will begin to form a clot, also known as coagulation, and form a semisolid, gel-like mass. Within an hour, it will start to shrink (retract). The entire retraction process takes about up to 24 hours.
During this time, the blood will separate on its own into layers. A straw-colored fluid will form at the top, known as serum. Serum contains no clotting factors, because they were used up in the coagulation process. These include fibrinogen and fibrin.
Fibrinogen plays a key role in the circulating blood in the plasma, or fluid portion of the blood, where it kicks off the coagulation process once it is converted into fibrin, which forms a mesh-like structure of fine threads needed to capture red blood cells, white blood cells and platelets in the formation of the actual clot.
The red top tube enables testing to be performed on serum.
|

Fibrin clot image, courtesy Britannica, https://www.britannica.com/science/fibrin#/media/1/205873/94920
|

4) Gold (Serum Separator Tube or SST): SST

Mnemonic: SST (S) = Stay

|
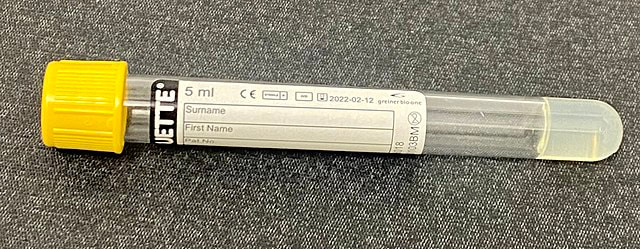
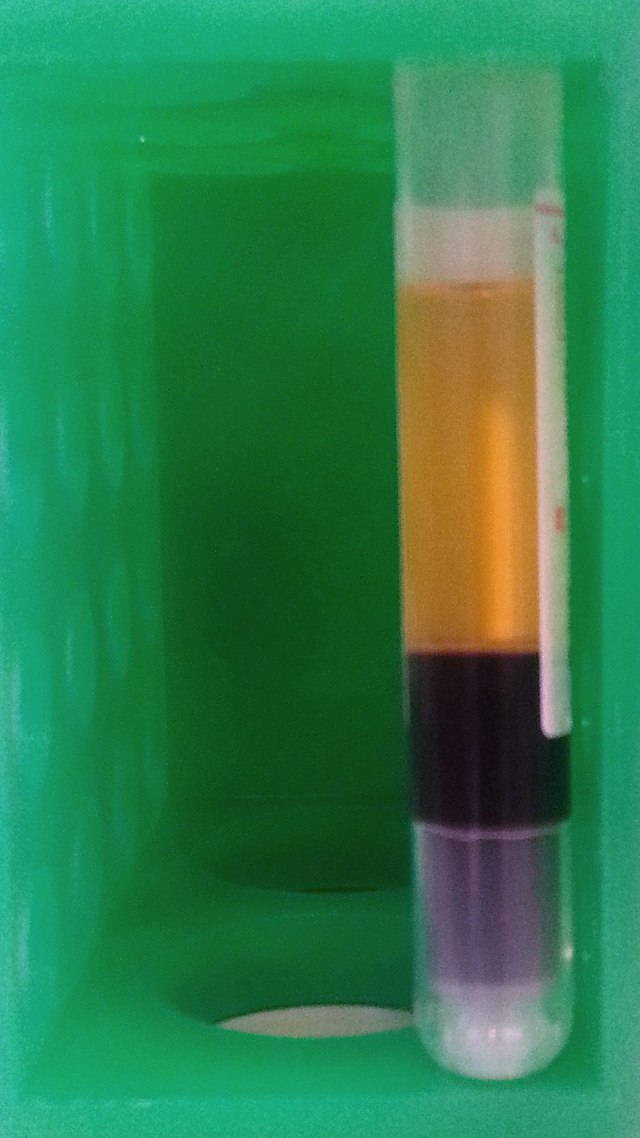
The gold top tube contains SST, a serum separator gel that moves up in between the packed red blood cells and plasma (+ buffy coat) after centrifugation. Before centrifugation, the blood needs to sit and clot for 30 minutes.
|
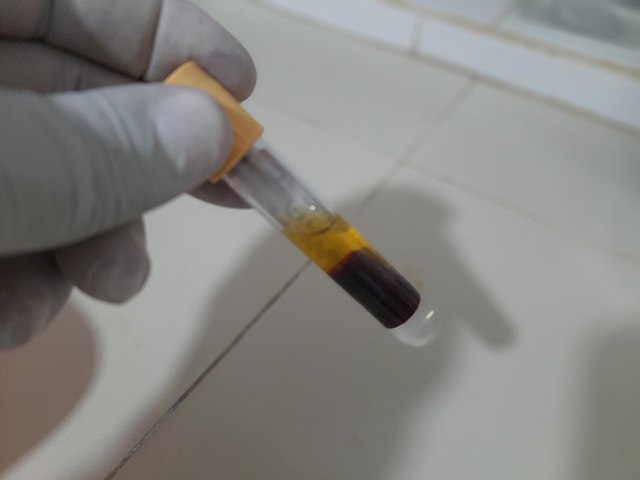
The gold/orange top tube, or tiger tube, is the SST tube, or serum separator tube. It contains a silicone gel plug at the bottom, which moves in between to separate the layers of blood during centrifugation. This is for blood that needs to be separated for testing. The separator gel additive aids in the process of the separation of the blood components, with serum above the gel and the other components below it. Prior to centrifugation, the tube should be left to sit for 30 minutes for clot formation to naturally occur.
Serum is used for chemistry, immunology and microbiology testing.
Serum is used for chemistry, immunology and microbiology testing.
5) Light Green Top Heparin (Light Contains PST)

Mnemonic: PST (Put)
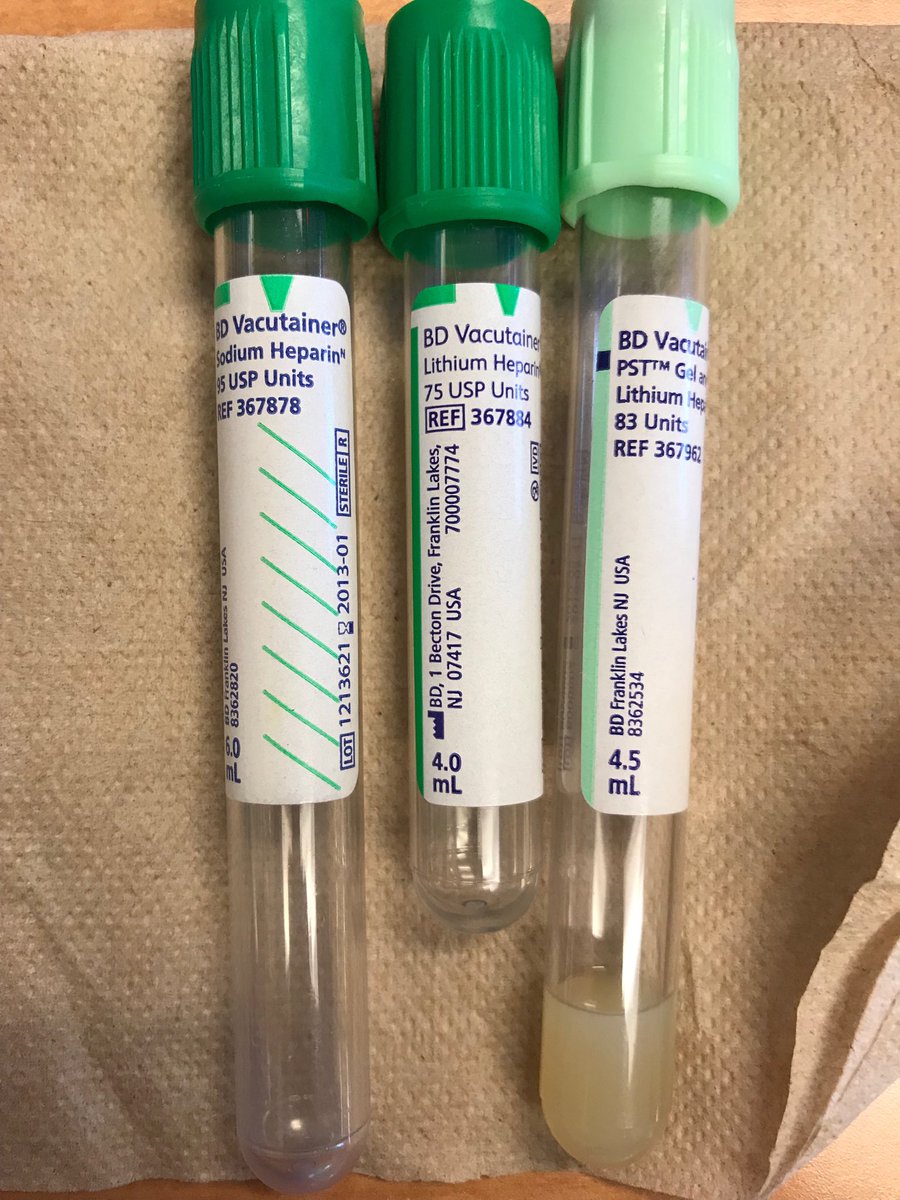
Heparin is the anticoagulant used to inactivate the blood-clotting factor thrombin. It is found in 2 forms: lithium heparin and sodium heparin and ammonium salts. Lithium heparin is the preferred type since it is least likely to interfere with testing for ions, being free of extraneous ions itself. It should not, however, be used for blood lithium levels.
Heparin is spray-coated in a tiny amount inside the tube, so you don't even see it. Once the tubes are filled with blood, the tubes should be inverted 8-10 times to thoroughly mix the additive with the blood. The PST is the plasma separator tube, or a gel, that moves in between the formed elements and plasma during centrifugation to separate the blood into layers.
Heparin tubes are used for testing the blood pH to determine whether it is normal, or the patient is in acidosis (<7.35) or alkalosis (>7.45). Normal blood pH is 7.35-7.45. Other tests performed on this tube include ionized calcium, electrolytes (Na+, Ca+, K+, Mg+, Cl-), blood gases, and osmolality. Heparin should not be used for coagulation studies.
6) Dark Green Top (Lithium Heparin): Green

Mnemonic: Green (G) = green
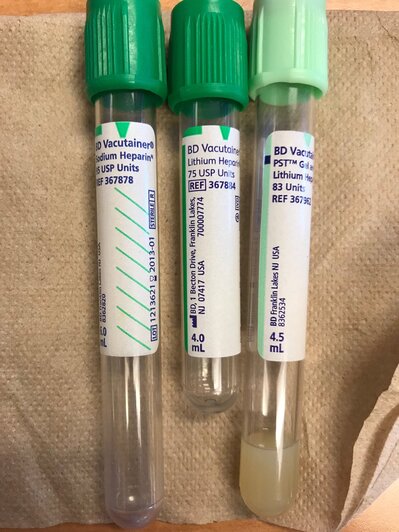
The dark green top contains lithium heparin
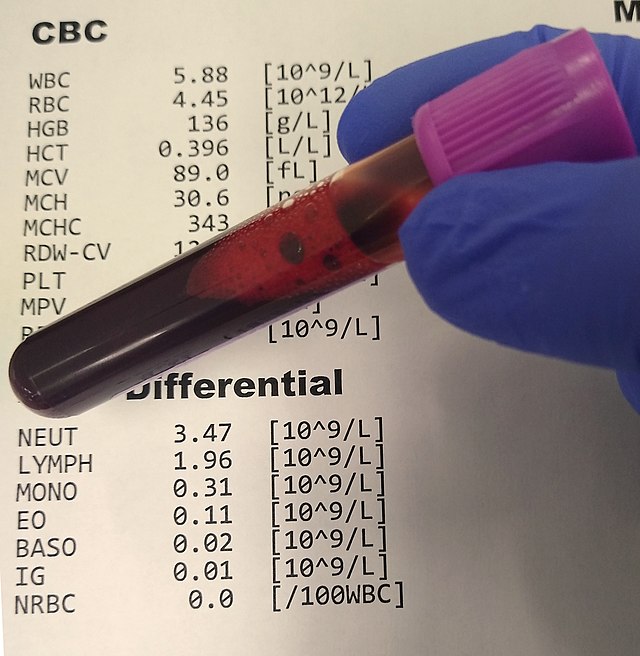
7) Lavender Top (and Pink Top): EDTA (Lavender)

Mnemonic: Lavender (L) = light
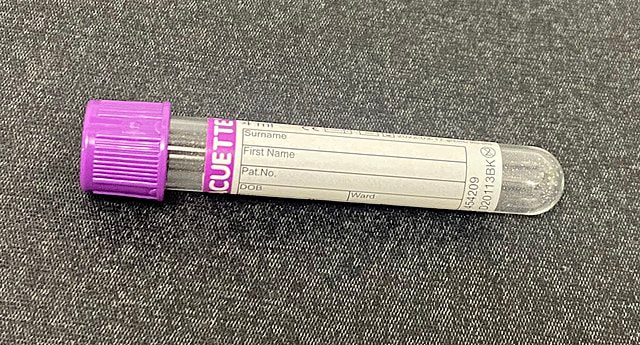
Lavender and pink top vacutainers contain the anticoagulant EDTA, ethylenediaminetetraacidic acid
|
|
The lavender top or pink top tubes are essential because they are used for so many different types of tests. The tops will be lavender, dark purple or pink. There are short and long sizes, but the principle is the same.
These tubes are spray-coated with the chelating agent K2EDTA, which binds calcium. The proper ratio of EDTA to whole blood is very important. This is one of the reasons we check expiration dates and do not use these beyond their expiration date. Test results will be altered if the ratio is incorrect. Too much EDTA will produce crenation of the red blood cells, which affects hematocrit, microhematocrit and manually performed packed cell volume.
This is the ideal tube for the complete blood count (CBC) with differential, because the correct ratio of EDTA to blood volume prevents shrinkage (crenation) of blood cells and prevents changes in cell volume upon standing. This tube is also used for the BNP, A1C, cross-matching, blood-typing and other tests. These tubes are checked for clot formation prior to testing, and if a clot is found, it is removed before it goes onto the analyzer.
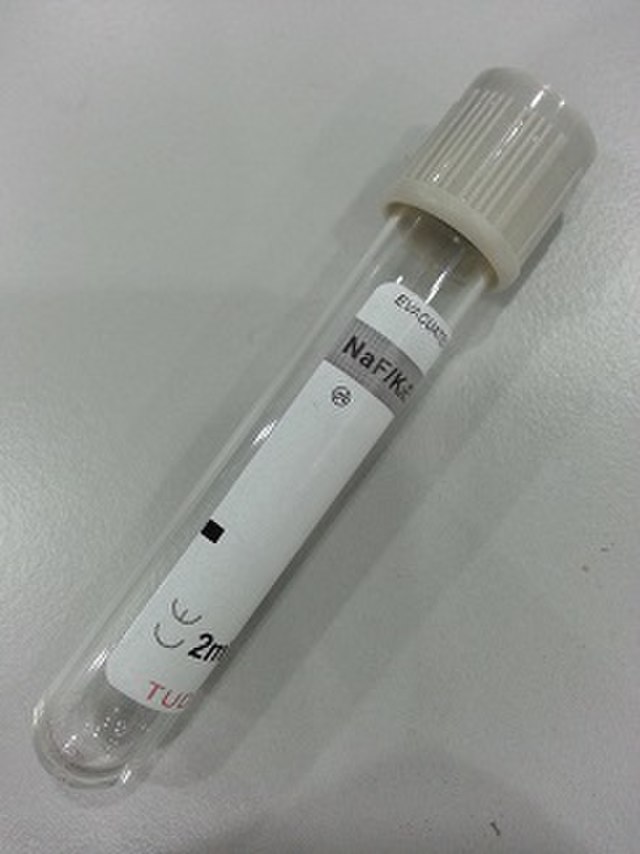
8) Gray Top (Sodium Fluoride): Gray

Mnemonic: Gray (G) = go
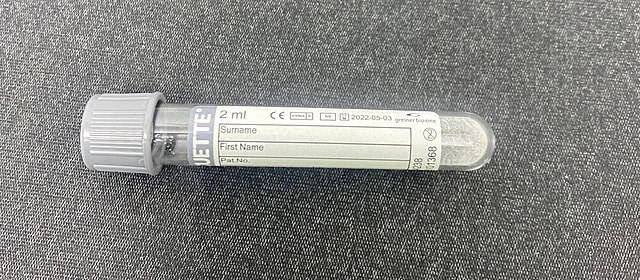
Sodium fluoride is the additive found in the gray-top tube, which prevents glycolysis of glucose, which aids in the diagnosis of and monitoring of blood glucose levels and diabetes.
|
|
Sodium fluoride is added to the gray top tube as a dry additive. It is also a weak anticoagulant. It is used mainly to preserve the blood glucose in order to prevent glycolysis, or breakdown of glucose, so blood glucose levels can be tested in determining the diagnosis and management of diabetes.
Next: Invert Your Tubes
It is crucial to invert the tubes after collection to make sure the additives and anticoagulants thoroughly mix with the blood for proper additive-to-blood ratios. Adverse effects can occur if you fail to perform this critical step. Here, I will talk about some of the adverse effects, then, I will reveal how many times to invert each tube to prevent these things from occurring.
Always make sure you check expiration dates, and never use the tubes beyond their expiration dates since any additive or anticoagulant may no longer be effective or may even be dried up. Also, make sure you collect the blood using the right tube for the test type, otherwise, the wrong type of additive or anticoagulant will also have adverse effects. All of these things may result in test result errors, the need for a recollection/redraw for the patient, or inability to test the blood.
Inversion of Tubes:
Gently invert your tubes to mix the anticoagulant or additive with the whole blood.
Always make sure you check expiration dates, and never use the tubes beyond their expiration dates since any additive or anticoagulant may no longer be effective or may even be dried up. Also, make sure you collect the blood using the right tube for the test type, otherwise, the wrong type of additive or anticoagulant will also have adverse effects. All of these things may result in test result errors, the need for a recollection/redraw for the patient, or inability to test the blood.
- Interference with the test assay
- If you collect the blood in the wrong tube, and the tube contains the same thing you are testing in the blood, or if it reacts the same way, then it will interfere with the test process and the results will be skewed.
- Example: Collection of blood in a lithium heparin tube for testing blood lithium levels (this will not work)
- Chelation
- Chelation is the removal of constituents to be measured.
- Example: If you use a tube containing an oxalate anticoagulant, and you want to test for blood calcium, do not use oxalate because oxalate actually removes (chelates) calcium from the blood, forming the salt calcium oxalate (insoluble).
- Enzyme action effects (promotion, destruction)
- An additive may effect enzyme reactions either by kicking off a reaction when it is not needed, or by destroying needed enzymes to be tested.
- Example: The gray top sodium fluoride tube destroys many enzymes, so it should not be used for certain enzyme assays or other types of testing.
- Alteration of the cells
- Some additives cause cells to shrink (crenate) or swell or burst (lyse).
- Examples:
- Oxalate: This distorts cells and causes cell crenation (shrinkage), formation of vacuoles in granulocytes, and distorts the shape of other types of lymphocytes and monocytes
- Heparin: This is not the correct tube type to use for the CBC because the cells need to be stained with Wright or Wright-Giemsa stain, which produce the wrong color if cells were in heparin anticoagulant (blue background).
- Incorrect amount of anticoagulant or additive
- If there is too little anticoagulant or additive, then partial clotting of whole blood will occur, and you'll need to manually remove the clot. This will, in turn, interfere with cell counts.
- If there is too much liquid anticoagulant, it will dilute the blood sample and interfere with measurements.
Inversion of Tubes:
Gently invert your tubes to mix the anticoagulant or additive with the whole blood.
- Blood culture bottles: 8-10x
- Blue Top Sodium Citrate: 3-4x
- Gold Top SST or Tiger: 5x
- Red Top: 5x
- Green Top PST (Light Green): 8-10x
- Green Top (Dark Green): 8-10x
- Purple Top K2EDTA (Lavender or Pink): 8-10x
- Gray Top Sodium Fluoride: 8-10x
Drug Effects on Samples:
If a patient is on certain medications, it may interfere with chemistry testing. They can alter chemical reactions and possibly alter the concentration of the substance needing to be measured or something in the test itself. Always find out if the patient is currently taking any medications, what they are, and the amounts.
Logging in Samples, Tracking, and Reporting:
Receiving, logging in specimens, and tracking them is part of the specimen processing and handling procedure. It must be done carefully and accurately in order to prevent errors.
Labels and reports should include the patient's name, unique identifier numbers, the type of sample collected, the source, the date and time of collection, the collector's name or initials, and laboratory tests to be done and the status. The information needs to include the time the sample arrived in the laboratory, test results, and the date/time of completion. This is legal documentation and must be stored as a permanent record and available for future reference.
Labels and reports should include the patient's name, unique identifier numbers, the type of sample collected, the source, the date and time of collection, the collector's name or initials, and laboratory tests to be done and the status. The information needs to include the time the sample arrived in the laboratory, test results, and the date/time of completion. This is legal documentation and must be stored as a permanent record and available for future reference.
Preserving and Storing Samples:
It is best to perform tests on fresh specimens or those preserved correctly if testing cannot be performed within 2 hours of collection. Refrigeration, removal of serum or plasma from formed elements, freezing, protecting samples from light, storing them in assigned spaces in racks are all ways in which samples should be handled with care.
